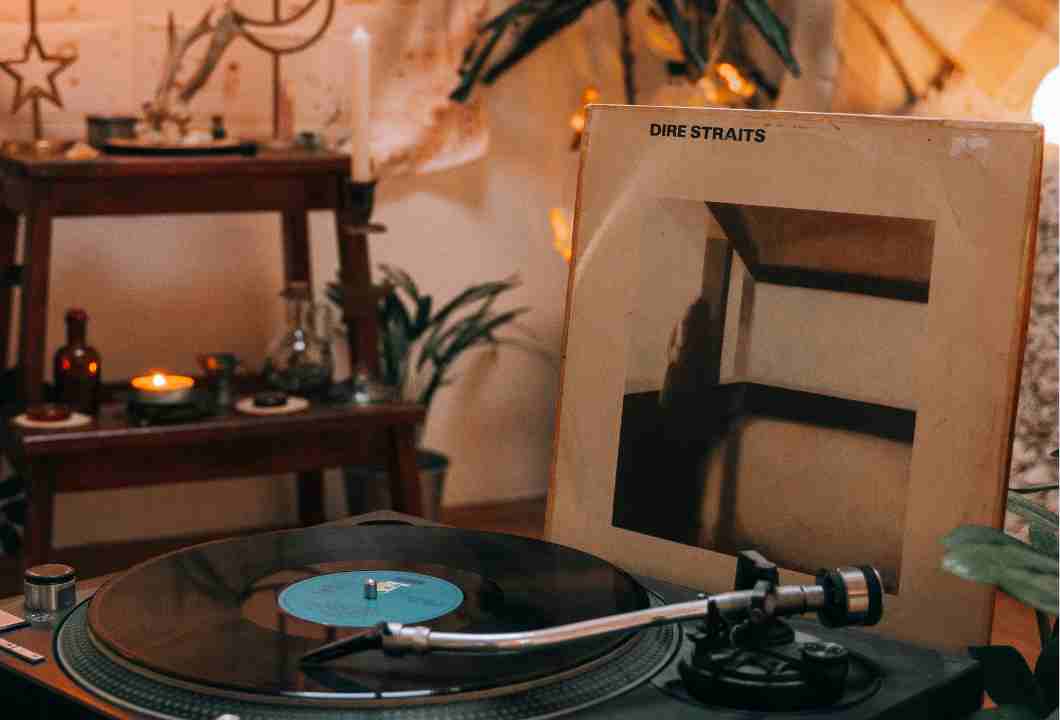
Cleaning a turntable is one of the simplest maintenance tasks you can perform, but it is also one of the easiest to get wrong.
Many beginners assume that if something looks dusty, it simply needs more cleaning. In reality, using the wrong cloth, too much liquid, or excessive pressure can damage finishes, scratch acrylic dust covers, contaminate bearings, or even bend delicate components.
This is especially true with vintage turntables. Older equipment often includes aging plastics, wood veneers, painted surfaces, and precision mechanical parts that are far more difficult to replace than they are to clean.
Fortunately, keeping a turntable in excellent condition does not require expensive products or complicated routines. In most cases, the safest approach is also the simplest: gentle cleaning, appropriate materials, and knowing which areas deserve extra care.
Quick Answer
To clean a turntable safely, disconnect the power, remove loose dust before using any moisture, clean each component with appropriate materials, and avoid harsh chemicals or excessive force—especially around the stylus, tonearm, bearings, and dust cover.
A careful cleaning routine helps preserve both sound quality and the long-term condition of your equipment.
Before You Start
Before cleaning your turntable, gather a few basic supplies.
You do not need a specialized restoration kit. Most regular maintenance can be performed using simple materials.
Recommended items:
- Microfiber cloth
- Soft anti-static brush
- Cotton swabs
- Distilled water
- Mild dish soap (only if necessary)
- Stylus brush or stylus cleaning gel
- Good lighting
Avoid using household cleaners unless you know they are safe for the material you are cleaning.
Why Safe Cleaning Matters
Dust may seem harmless, but over time it becomes one of the biggest enemies of both records and playback quality.
A neglected turntable can accumulate dirt on the platter, mat, stylus, controls, and even around moving parts.
This may contribute to:
- increased surface noise
- stylus contamination
- unnecessary record wear
- dirt entering mechanical components
- static buildup
- a system that performs below its potential
Regular maintenance is not just about appearance.
A clean turntable helps the stylus track the groove more consistently and reduces the amount of debris transferred from one record to another.
Step 1 — Remove Loose Dust First
Always begin with dry cleaning.
This is one of the most overlooked steps.
If you wipe a dusty surface with a damp cloth immediately, tiny particles can act like abrasives and leave fine scratches.
Instead, remove loose dust first using a soft brush or dry microfiber cloth.
Clean around:
- the plinth
- the platter
- the mat
- the dust cover
- buttons and controls
Only after loose dust has been removed should you consider using a slightly damp cloth where necessary.
OneBrightGuide Tip
Cleaning is not about applying more pressure—it is about removing contaminants before they have a chance to scratch delicate surfaces.
Step 2 — Clean the Plinth
The plinth is the main body of the turntable and may be constructed from wood veneer, painted metal, plastic, MDF, or composite materials.
Different finishes require different levels of care, but the safest general method is remarkably simple.
Use a microfiber cloth that is only slightly damp.
If fingerprints or stubborn dirt remain, add a tiny amount of mild soap diluted in distilled water.
Afterwards:
- wipe again with clean water
- dry immediately using another microfiber cloth
Never spray liquid directly onto the turntable.
Always apply moisture to the cloth first.
Avoid:
- soaking the surface
- abrasive sponges
- paper towels
- strong solvents
- excessive alcohol
The goal is to remove dirt—not the finish.
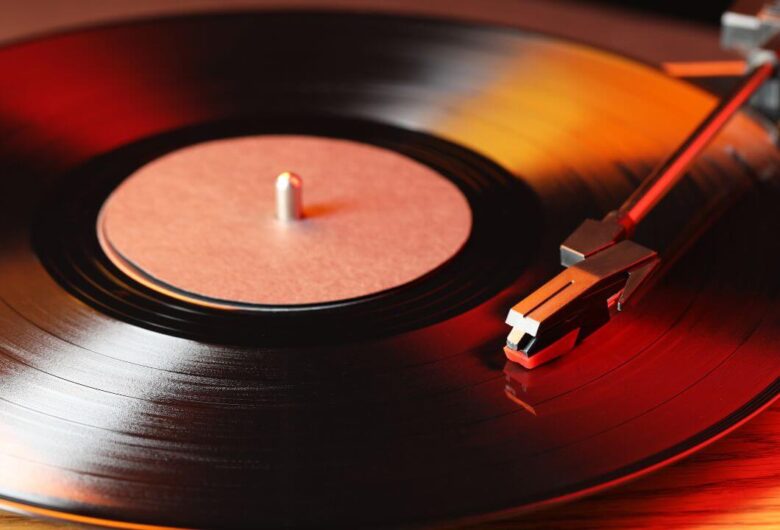
Step 3 — Clean the Platter and Mat
Remove the mat before cleaning.
Cleaning the platter and mat separately produces better results and prevents dirt from being transferred back onto the record surface.
Rubber Mats
Use a damp microfiber cloth.
If necessary, use a small amount of mild soap.
Allow the mat to dry completely before reinstalling it.
Felt Mats
Use a lint roller or a soft brush.
Avoid soaking felt unless the manufacturer specifically recommends it.
Metal or Acrylic Platters
Wipe gently with a microfiber cloth.
For stubborn dirt, use a cloth lightly dampened with distilled water.
Dry immediately afterwards.
If your platter lifts off easily, you may also remove it to clean around the spindle.
Only do this if you are familiar with your turntable’s design and feel comfortable reinstalling it correctly.
Step 4 — Clean the Dust Cover
The dust cover is often the first part people notice—and unfortunately, one of the easiest to scratch.
Never scrub a dusty cover.
Remove loose dust first.
Then wipe gently using a clean microfiber cloth with very light pressure.
If additional cleaning is required, lightly dampen the cloth with distilled water.
Finish by drying the surface with another clean microfiber cloth.
Avoid:
- glass cleaners containing ammonia
- circular scrubbing motions
- rough cloths
- paper towels
- aggressive polishing compounds
If the dust cover already has scratches, routine cleaning will not remove them.
Its purpose is to prevent further damage, not restore the surface.
Step 5 — Clean Around the Tonearm Carefully
The tonearm contains some of the most precise mechanical parts in the entire turntable.
Treat it accordingly.
Using a soft brush or dry microfiber cloth, gently remove dust from:
- the tonearm tube
- the headshell
- the cueing platform
- the counterweight
- the tonearm base
Work slowly and avoid placing sideways pressure on the arm.
Never force the tonearm while cleaning.
Accidental movement places unnecessary stress on bearings that are designed for extremely precise movement.
Common Mistake
Many beginners try to hold the tonearm while cleaning underneath it.
Instead, secure the arm in its rest whenever possible and clean around it carefully.
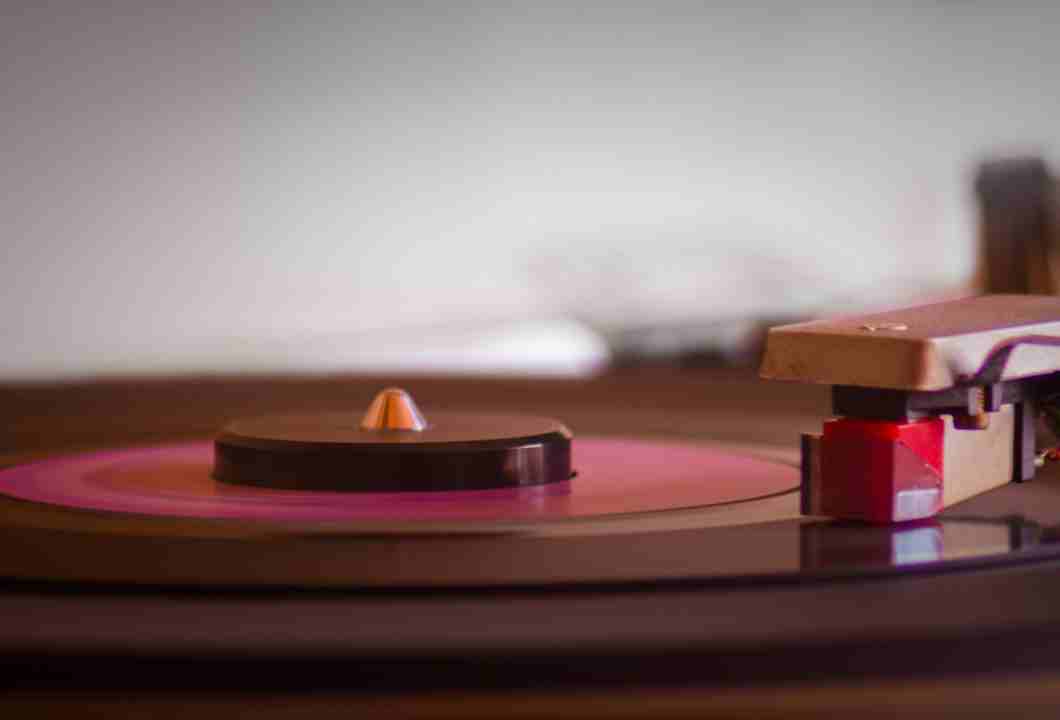
Step 6 — Clean the Stylus Safely
The stylus is the smallest component of the turntable, but it has the greatest influence on playback quality.
Even a small buildup of dust can reduce detail, increase distortion, and accelerate both stylus and record wear.
Cleaning it correctly only takes a few seconds.
Use a stylus brush or a stylus cleaning product specifically designed for cartridges.
Always brush from the back of the stylus toward the front, following the same direction the record travels beneath it.
Never brush:
- side to side
- from front to back
- upward against the cantilever
These movements can bend or damage the cantilever, which is one of the most delicate parts of the entire playback system.
If you use a stylus cleaning gel, lower the stylus gently onto the gel following the manufacturer’s instructions. Let the product do the work—never apply extra pressure.
OneBrightGuide Tip
A clean stylus not only sounds better but also stays cleaner for longer when your records are cleaned regularly. Record care and stylus care always go together.
Step 7 — Clean Around Controls and Connections
Dust has a habit of collecting in places that are easy to overlook.
Take a few minutes to inspect areas such as:
- speed selector
- pitch controls
- cueing lever
- RCA output connections
- grounding terminal
- dust cover hinges
Use a soft brush or a dry cotton swab to remove accumulated dust.
Avoid spraying contact cleaners or lubricants into switches unless you are performing a specific electrical repair and know exactly what product is appropriate.
Routine cleaning should remain completely dry in these areas.
What Not to Use
One of the biggest mistakes beginners make is assuming that stronger cleaning products produce better results.
They usually do the opposite.
Avoid using:
- household cleaners
- ammonia-based glass cleaners
- abrasive sponges
- paper towels
- furniture polish
- excessive amounts of alcohol
- silicone sprays
- random lubricants
- compressed air blown directly into bearings or switches
A turntable is a precision mechanical device—not household furniture.
Gentle cleaning almost always produces better long-term results than aggressive cleaning.
How Often Should You Clean a Turntable?
Most turntables do not require constant deep cleaning.
A simple routine is enough to keep both the equipment and your records in excellent condition.
After Every Listening Session (Optional but Recommended)
- Remove loose dust from the record.
- Inspect the stylus for visible debris.
- Close the dust cover after use.
Weekly
- Dust the plinth.
- Dust the dust cover.
- Remove visible dust around the controls.
Monthly
- Clean the platter.
- Clean the mat.
- Inspect cable connections.
- Clean around the tonearm base.
Every Few Months
- Perform a more careful external cleaning.
- Check for accumulated dust in difficult-to-reach areas.
- Inspect the stylus more closely for wear and contamination.
The dustier the room—or the more frequently the turntable is used—the more often these steps may be needed.
Signs Your Turntable Needs Cleaning
Sometimes the turntable tells you it’s time for maintenance.
Common signs include:
- visible dust around the platter
- dust collecting on the stylus
- increased surface noise
- dull or less detailed sound
- static attraction
- dirt around switches and hinges
- fingerprints on frequently touched surfaces
Cleaning will not solve every playback problem.
However, allowing dirt to accumulate almost always creates new ones.
Quick Cleaning Checklist
Before finishing, make sure you have:
✓ Removed loose dust before using any moisture.
✓ Cleaned the plinth with a microfiber cloth.
✓ Cleaned the platter and mat separately.
✓ Wiped the dust cover gently.
✓ Removed dust around the tonearm.
✓ Cleaned the stylus correctly.
✓ Checked controls and cable connections.
✓ Avoided harsh chemicals and excessive moisture.
Frequently Asked Questions
Can I use alcohol to clean my turntable?
Small amounts of isopropyl alcohol may be safe on certain metal parts, but it should not be considered a general-purpose cleaner. Many vintage finishes, plastics, painted surfaces, and dust covers can be damaged by repeated exposure. When in doubt, use distilled water and a microfiber cloth.
Should I remove the platter every time I clean the turntable?
No. Removing the platter occasionally for a more thorough cleaning is enough. Routine maintenance can usually be done with the platter in place.
Is compressed air safe?
Compressed air can be useful for some electronic equipment, but blowing high-pressure air directly into bearings, switches, or delicate mechanical parts may force dust deeper inside. A soft brush is usually the safer choice.
How often should I clean the stylus?
Inspect it regularly and clean it whenever visible dust or debris is present. If you play records frequently, checking the stylus every few listening sessions is a good habit.
Final Thoughts
Keeping a turntable clean is not about making it look new—it is about preserving the precision that allows it to reproduce music accurately.
Most routine maintenance takes only a few minutes, yet it helps protect the stylus, reduces unnecessary record wear, and keeps the entire playback system performing consistently.
The safest cleaning routine is also the simplest: remove dust gently, use appropriate materials, avoid excessive force, and never rush around delicate components.
With a few careful habits, even a decades-old turntable can continue delivering reliable performance for many years.
Continue Learning
After cleaning your turntable, these guides will help you keep your system performing at its best:
- Beginner Turntable Setup Checklist: What to Check Before Playing Records
- Tracking Force and Anti-Skate: How to Choose Safe Values for Your Cartridge
- How to Identify the Correct Turntable Stylus
- Vinyl Cleaning Without Excess: A Routine That Preserves and Prevents Wear
- Does Playing Records Too Often Damage Them? What Really Causes Vinyl Wear